How to create WordPress email subscription popup for MailChimp
This tutorial will guide you how to create a MailChimp email subscription form popup or an email sign-up form popup for your WordPress website.
You can connect to your MailChimp account and select an audience list. If the audience list has Groups, you can specify default interests for the subscribers or show the interests as checkboxes, radio buttons or a dropdown in the email subscription form.
The email subscription form can be configured to automatically popup on your whole WordPress website, or only on some specified post categories, pages or devices. You can also configure when to display the popup, for example, only show the popup after the visitor has viewed some content or has spent some seconds on the webpage or when the visitor is going to leave the webpage.
You can also set up the form to show up when clicking a link or a button. A demo created with this tutorial is as follows: Click to Show MailChimp Email Subscription Popup
There are 5 steps in the tutorial:
- Step 1 - Install Wonder Popup
- Step 2 - Create a new email subscription popup
- Step 3 - Get your MailChimp API key
- Step 4 - Connect to MailChimp and configure MailChimp service
- Step 5 - Publish the popup
Step 1 - Install Wonder Popup
First please install the plugin Wonder Popup. You can download the free version from the product home page, test it, make sure it works for you before upgrading to the commercial version.
Step 2 - Create a new email subscription popup
After you have installed the Wonder Popup plugin, in your WordPress backend, goto left menu Wonder Popup -> Add New and create a new popup. Wonder Popup supports 4 kinds of forms:
- Lightbox: Create a lightbox popup that displays in the center of the web browser
- Embed: Embed into pages, posts or sidebar widgets
- Slide In: Create a popup that slides in from corner
- Notification Bar: Create a bar that displays on top or bottom of the web page
Step 3 - Get your MailChimp API key
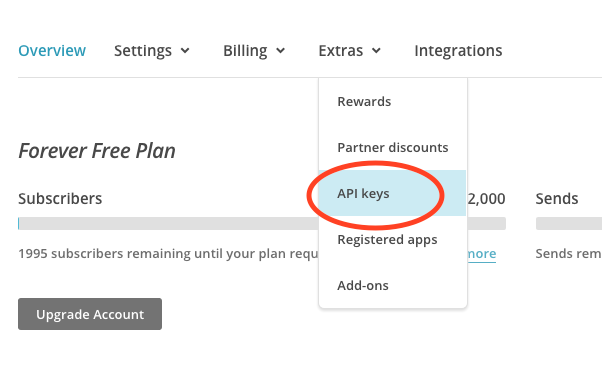
To get your MailChimp API key, log into your MailChimp account, click your profile name on the top right corner of the page, and choose Account from the drop-down menu.

Click the Extras menu and choose API keys from the drop-down list, then copy an existing API key or click the Create A Key button.
Step 4 - Connect to MailChimp and configure MailChimp service
In the popup plugin, click Step 3 Email Service, select MailChimp from the Email Subscription Service list. Enter your MailChimp API key and click the "Get Audience List by Key" button, the plugin will connect to your MailChimp account and get all your MailChimp audiences.
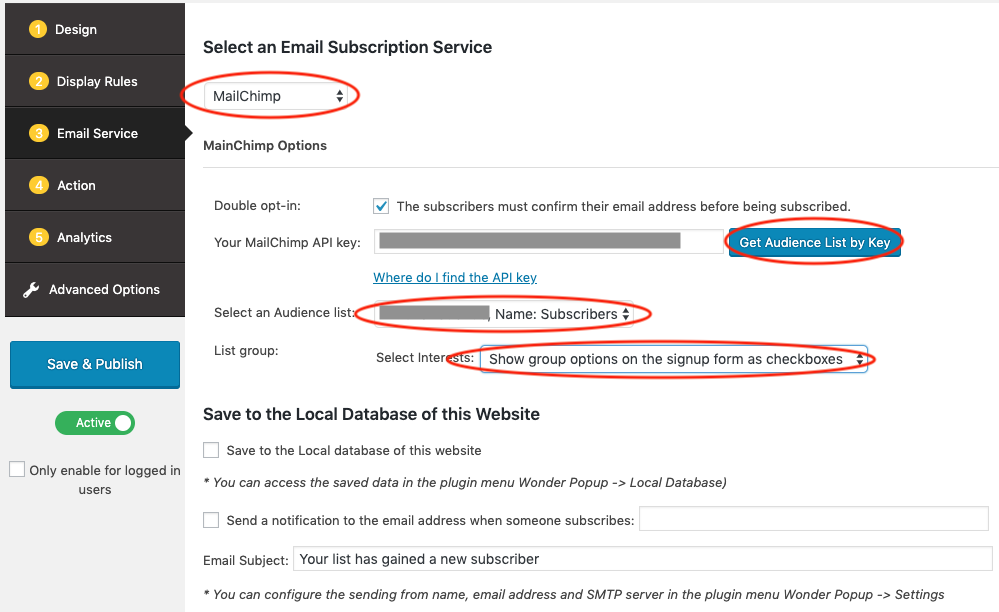
click to enlarge the image
Select an audience list from the drop down list. If your audience list has defined Groups, you can configure how to display the Interests in the email subscription form. You can display the Interests as checkboxes, radio buttons or a dropdown. You can also hide the Interests selection and choose default Interests for the subscribers.
Step 5 - Publish the popup
To configure where and when to display the email subscription popup, in the popup editor, goto Step 2 Display Rules.
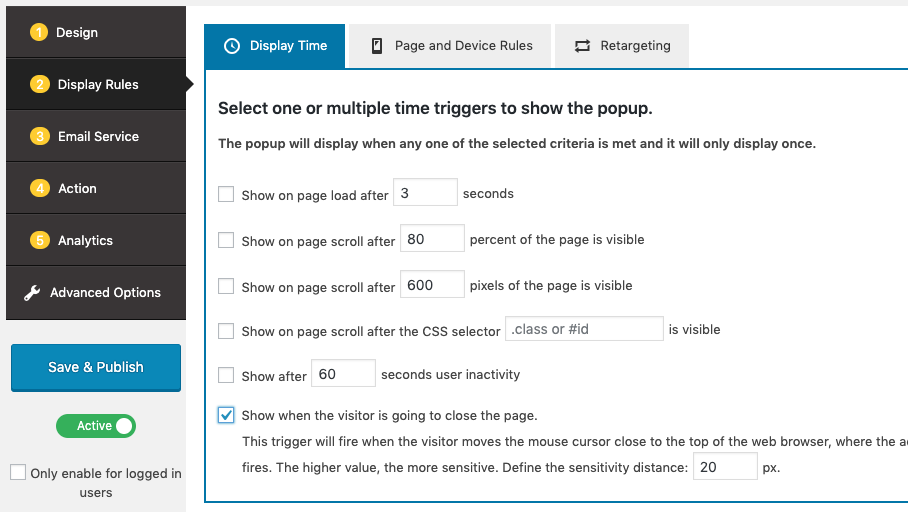
click to enlarge the image
To configure what to do after the visitor subscribes, goto Step 4 Action. You can display a message to the subscriber, or redirect the subscriber to another webpage.
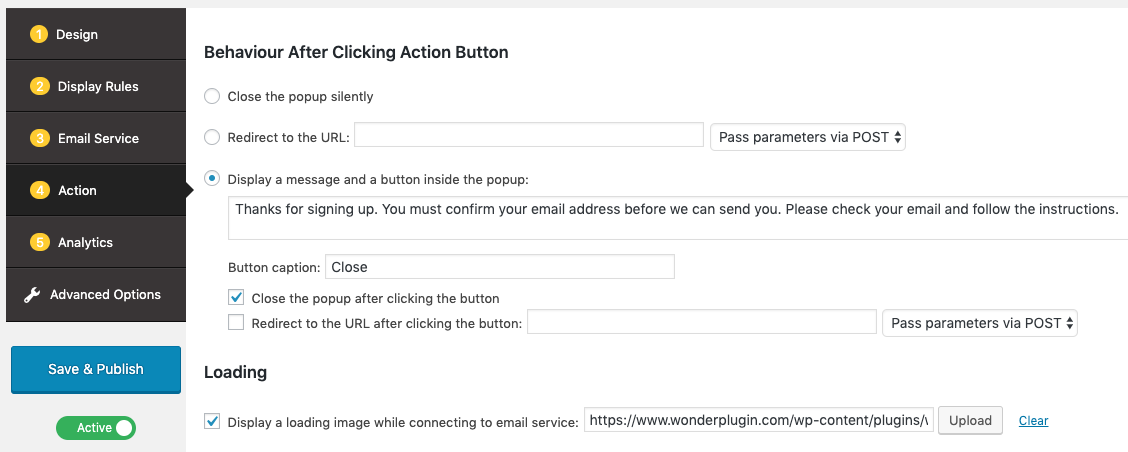
After you have finished the setup, click the "Save & Publish" button to publish the popup.
