WonderPlugin Tabs Plugin Quick Start Guide
Menu Options
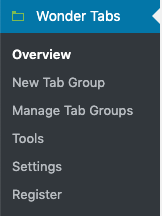
After you install the plugin Wonder Tabs, a menu tab will be added to the main navigation menu of WordPress dashboard. There are 6 items in the menu: Overview, New Tab Group, Manage Tab Groups, Tools, Settings and Register.
Overview: the overview menu displays a welcome page that contains the plugin version and links to other functions of the plugin.
New Tab Group: create a new tab gruop
Manage Tab Groups: edit, delete and clone existing tab groups
Tools: export tab groups to XML files and import them to another WordPress website. It also includes a function to search and replace strings in the tab group.
The "Search and Replace" function is useful when you migrate a WordPress site and change the domain. You can use the function to search the old domain and replace it with the new domain.
Settings: the settings page includes options to set up the minimum user role of the plugin, enable WPML support etc.
Register: enter your license key and register your website. This menu is only available in the commercial version.
Create a new tab group
Please view the following tutorial for how to create a tab group and add it to a WordPress page, post or widget: How to add tabbed content to WordPress posts, pages and widgets.
Manage existing tab groups
To manage existing tab groups, in your WordPress backend, goto left menu Wonder Tabs -> Manage Tab Groups. Place the mouse on top of the tab group, it will show text links to edit, clone, delete or view the tab group.

