How to Manually Upgrade the Plugin Without Losing Existing Work

This tutorial guides you through the process of manually upgrading the plugin to a new version. You can follow these instructions to upgrade from the Free version to the Pro version, or to update either version to the latest release.
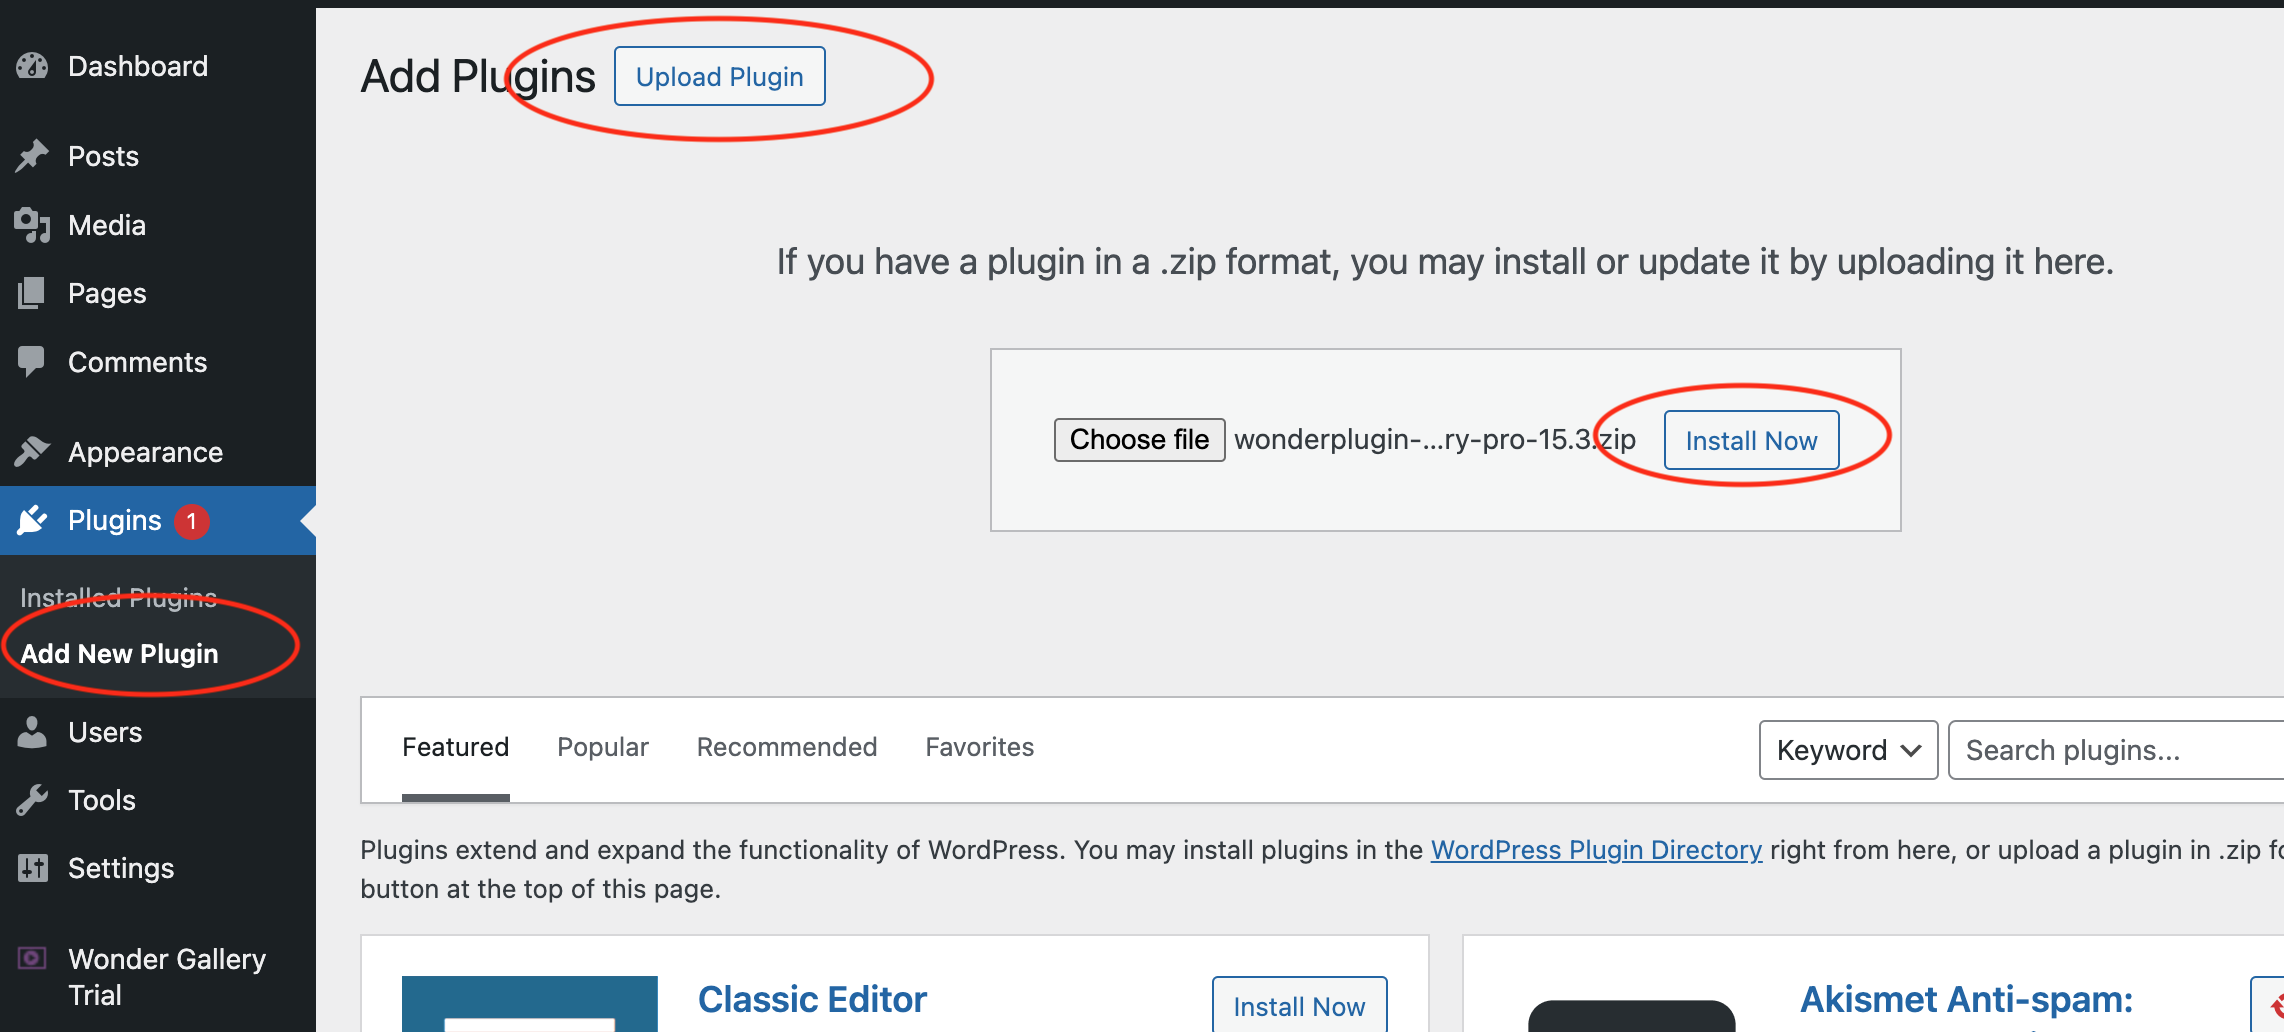
Before proceeding with the tutorial, we strongly recommend making a backup of your WordPress website.

There are two methods for manually upgrading the plugin to its latest version:

The First Method

There are 4 steps in this method:

Step 1 - Make sure the keep data option is enabled

In your WordPress backend, goto the left menu Plugin Name (e.g., Wonder Carousel, Wonder Slider, etc) -> Settings, make sure there is an option Keep data when deleting the plugin and the option is checked. The option is checked by default. If your current version is very old, it may not have this option. In this case, do not use this method, use the following second method instead.

Step 2 - Deactivate and delete the old version

In the WordPress backend, goto the left menu Plugins -> Installed Plugins, deactivate the plugin and delete it. When deleting the plugin, ignore the warning "Are you sure you wish to delete these files and data" and click the button "Yes, Delete these files and data". This is a standard warning from WordPress.

Step 3 - Install and activate the new version

In the WordPress backend, goto the left menu Plugins -> Add New, click Upload Plugin, select the downloaded new version plugin zip file, install and activate it.

Step 4 - Clear WordPress Caches

  • If you have installed a WordPress js/css minify plugin or WordPress cache plugin for example, Autoptimize, W3 Total Cache, WP Rocket, WP Fastest Cache, WP Super Cache, empty all caches from the plugin.
  • Some web hosts, for example, GoDaddy, WPEngine, SiteGround, DreamHost, will also cache web files. You need to clear caches of the web hosting before testing. Please contact your web hosting provider and ask about how to clear caches.
  • Clear caches of your web browser before testing

The Second Method

If you are using a very old version, you may need to use this method to upgrade the plugin. There are 3 steps in this method:

Step 1: Install the new version plugin via FTP

First please extract the new version plugin ZIP file to a folder on your computer, then upload the extracted Plugin folder to the wp-content/plugins folder in your WordPress FTP server.

When a ZIP file is extracted, some unzip software may add a parent folder outside of the Plugin folder. Please make sure you have uploaded the Plugin folder, not its parent folder.

If your WordPress already has an old version installed, make sure to overwrite the existing folder in the server. Or you can delete the old version files first then upload the new version files.

Step 2: Make sure the plugin is activated

In your WordPress backend, left menu, Plugins -> Installed Plugins, find the plugin from the list, make sure the plugin is activated. If it's not, click the Activate link.

Step 3 - Clear WordPress Caches

  • If you have installed a WordPress js/css minify plugin or WordPress cache plugin for example, Autoptimize, W3 Total Cache, WP Rocket, WP Fastest Cache, WP Super Cache, empty all caches from the plugin.
  • Some web hosts, for example, GoDaddy, WPEngine, SiteGround, DreamHost, will also cache web files. You need to clear caches of the web hosting before testing. Please contact your web hosting provider and ask about how to clear caches.
  • Clear caches of your web browser before testing