This tutorial will show you how to create a WordPress HTML content slider by using the plugin Wonder Carousel.
You only need to select images, enter text or HTML code for title and description, select a skin, the plugin will create an HTML content slider that you can add to a WordPress page or post.
There are 4 steps in this tutorial:
- Step 1 - Install Wonder Carousel
- Step 2 - Add images, enter text or HTML code for title and description
- Step 3 - Select an HTML content slider skin
- Step 4 - Publish the slider
At the end of this tutorial, we will create a WordPress HTML content slider as follows:


Step 1 - Install Wonder Carousel
First please install the WordPress plugin Wonder Carousel. You can download the free version from the plugin home page, try it, make sure it works for you before upgrading to the commercial version.
Step 2 - Add images, enter text or HTML code for title and description
After you have installed Wonder Carousel, in your WordPress backend, left menu, goto Wonder Carousel -> New Carousel, create a new carousel.
In the carousel editor, step 1, click the button Add Image.
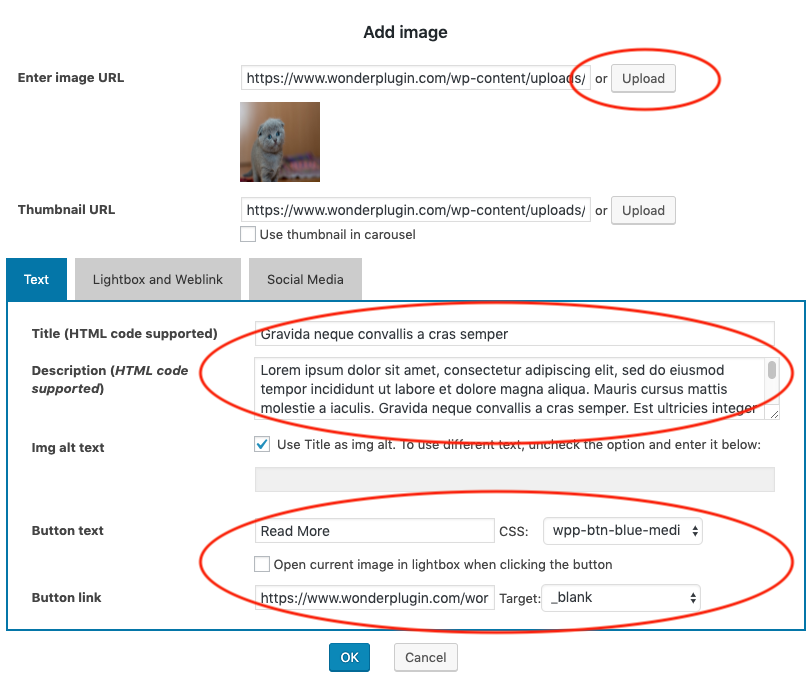
In the Add Image dialog, upload an image file or select an image file from Media Library, enter title and description for the slide. If you want to display a button, enter the button text and link.
Step 3 - Select an HTML content slider skin
In the plugin, step 2 Skins tab, select the skin "HTML Content Slider" or "HTML Content Slider with Title".

Step 4 - Publish the slider
Click the button "Save & Publish" to publish the carousel. To embed the carousel to a WordPress page or post, copy the provided shortcode and paste it to the page or post.
