This tutorial will guide you how to create a WordPress Carousel to display WooCommerce on sale products.
There are three steps in this tutorial:
- Step 1 - Install Wonder Carousel
- Step 2 - Add WooCommerce on sale products to the carousel
- Step 3 - Publish the WooCommerce on sale Products Carousel
You can view the demo created with this tutorial: WooCommerce On Sale Products Carousel.
For a detailed tutorial on how to add product price, star ratings, total sales and Add To Cart button to the carousel, how to create a WooCommerce best selling products carousel and WooCommerce featured products carousel, please view the tutorial: How to create a WooCommerce Products Carousel.
Step 1 - Install Wonder Carousel
First please install the premium plugin Wonder Carousel. You can download the free version from the plugin homepage, test it, make sure it works for you before upgrading to the commercial version.
Step 2 - Add WooCommerce products to the carousel
After you have installed the plugin Wonder Carousel, in your WordPress backend, goto left menu, Wonder Carousel -> New Carousel, create a new carousel.
In the carousel editor, step 1, click the button "Add WooCommerce / Custom Post Type".
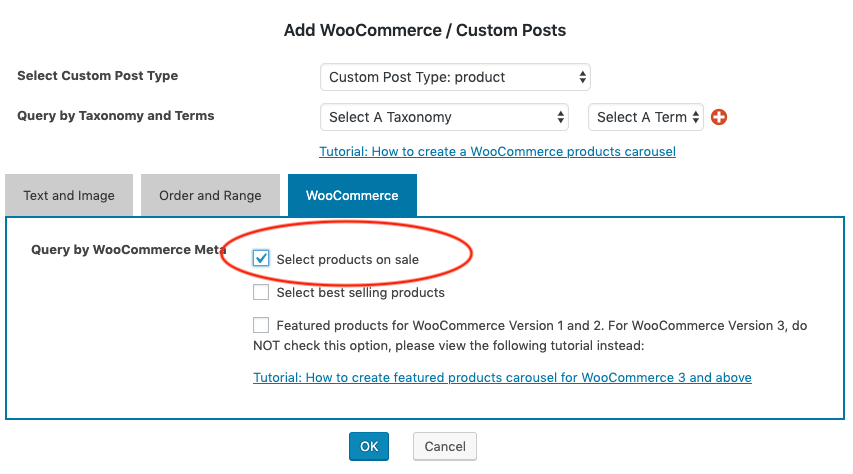
In the "Add WooCommerce / Custom Post Type" dialog, select "product" from the "Custom Post Type".
To create a WooCommerce carousel for products on sale, in the "Add WooCommerce / Custom Post Type" dialog, goto WooCommerce tab, select the option " Select products on sale".
Step 3 - Publish the WooCommerce Products Carousel
After you have added the WooCommerce on sale products to the carousel, click the Save & Publish button to publish the carousel. The plugin will save the carousel and display its shortcode.
To add the WooCommerce on sale products carousel to a WordPress page or post, copy the shortcode and add it to the page or post.
