This tutorial will guide you how to create a fullscreen WordPress slideshow. A demo created with this tutorial is as follows: https://www.wonderplugin.com/a-fullscreen-slideshow/
The full screen slideshow created in this tutorial has no page header, menu, sidebar and toolbar.
If you want to create a full screen slideshow as page background, or create a full screen slideshow with the page header and menu, please view the tutorial: WordPress full screen background slider.
Step 1 - Create a WordPress page without header, menu, sidebar and footer
Please view this tutorial and create a WordPress page without header, menu, sidebar and footer: https://www.wonderplugin.com/wordpress-tutorials/how-to-create-a-wordpress-page-without-header-menu-sidebar-and-footer/
Step 2 - Install Wonder Slider

In this step please install the plugin Wonder Slider. You can download the Free Version from the product homepage, try it, make sure it works for you before upgrading to the commercial version.
Step 3 - Create a new slider
In Wonder Slider, create a new slider, in step 1, add your images, in step 2, select the skin "Header". This skin will create a slideshow without thumbnails, navigation bullets and arrows.
For how to use Wonder Slider, please view the YouTube quick start video: How to create a WordPress Slider.
Step 4 - Configure the slider to be fullscreen
In step 3 Options tab, Slider Options, check the option "Responsive" -> "Create a full width slider" and "Extend to the parent container height".
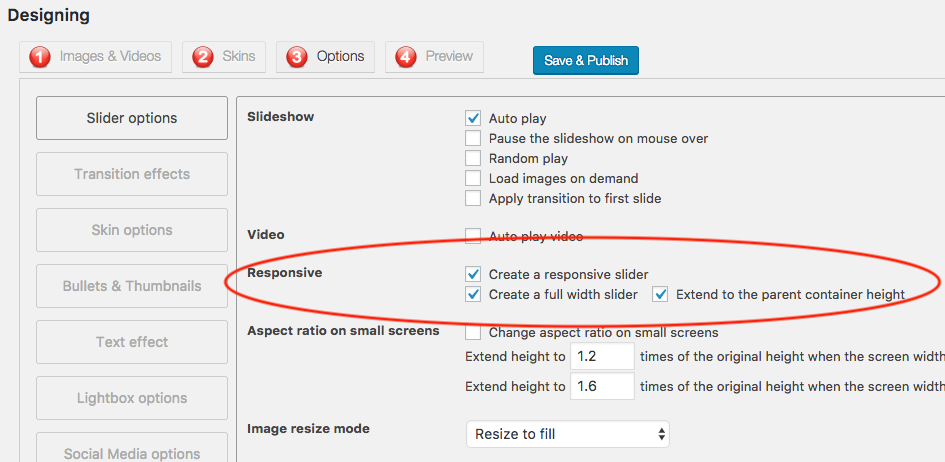
click to enlarge the image
In step 3 Options tab, Advanced Options, add the following text to the Custom CSS input box:
body, html {
  height: 100%;
  margin: 0;
  padding: 0;
}
The screenshot is as follows:
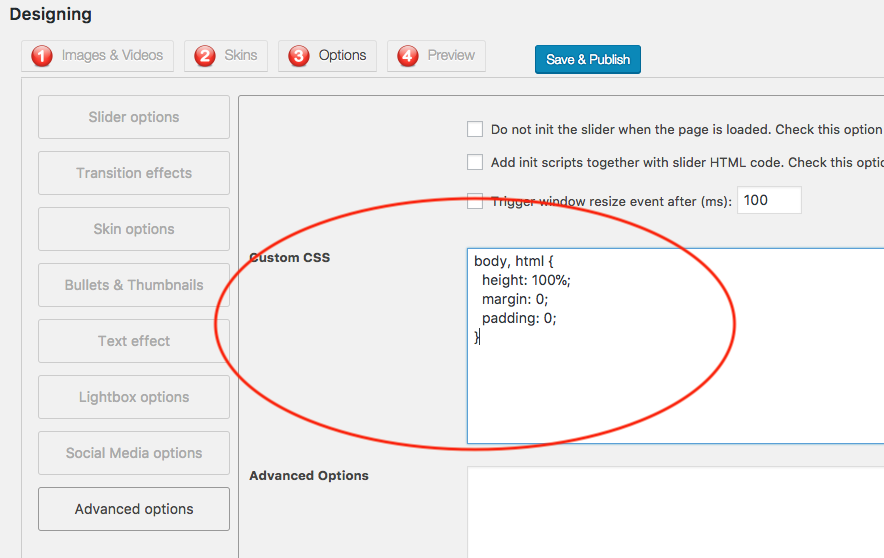
click to enlarge the image
Step 5 - Publish the slider
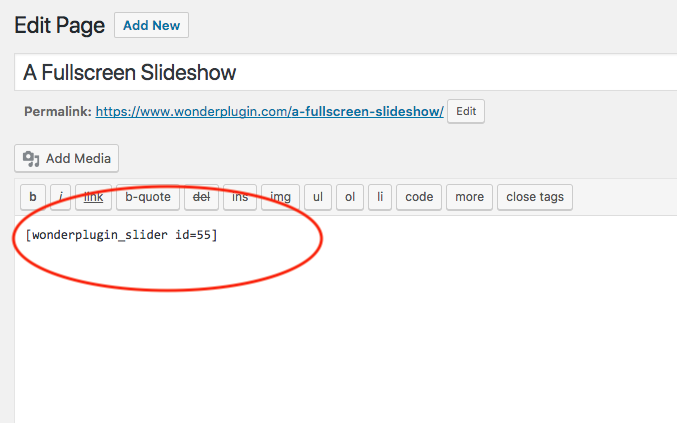
Save the slider and add the slider shortcode to the WordPress page created in the first step of this tutorial.