Product:
Tutorial:
This tutorial will guide you how to create WordPress tabs with subtitles in the tab headers.
You can view the online demo: WordPress Tabs with subtitles.
There are two steps in this tutorial:
- Step 1 - Create a tab group with subtitles
- Step 2 - Add custom CSS code to style the tab headers
Step 1 - Create a tab group with subtitles
You can view the following document for how to create WordPress tabs with Wonder Tabs, and add the created tabs to your WordPress site: Wonder Tabs Help Document.
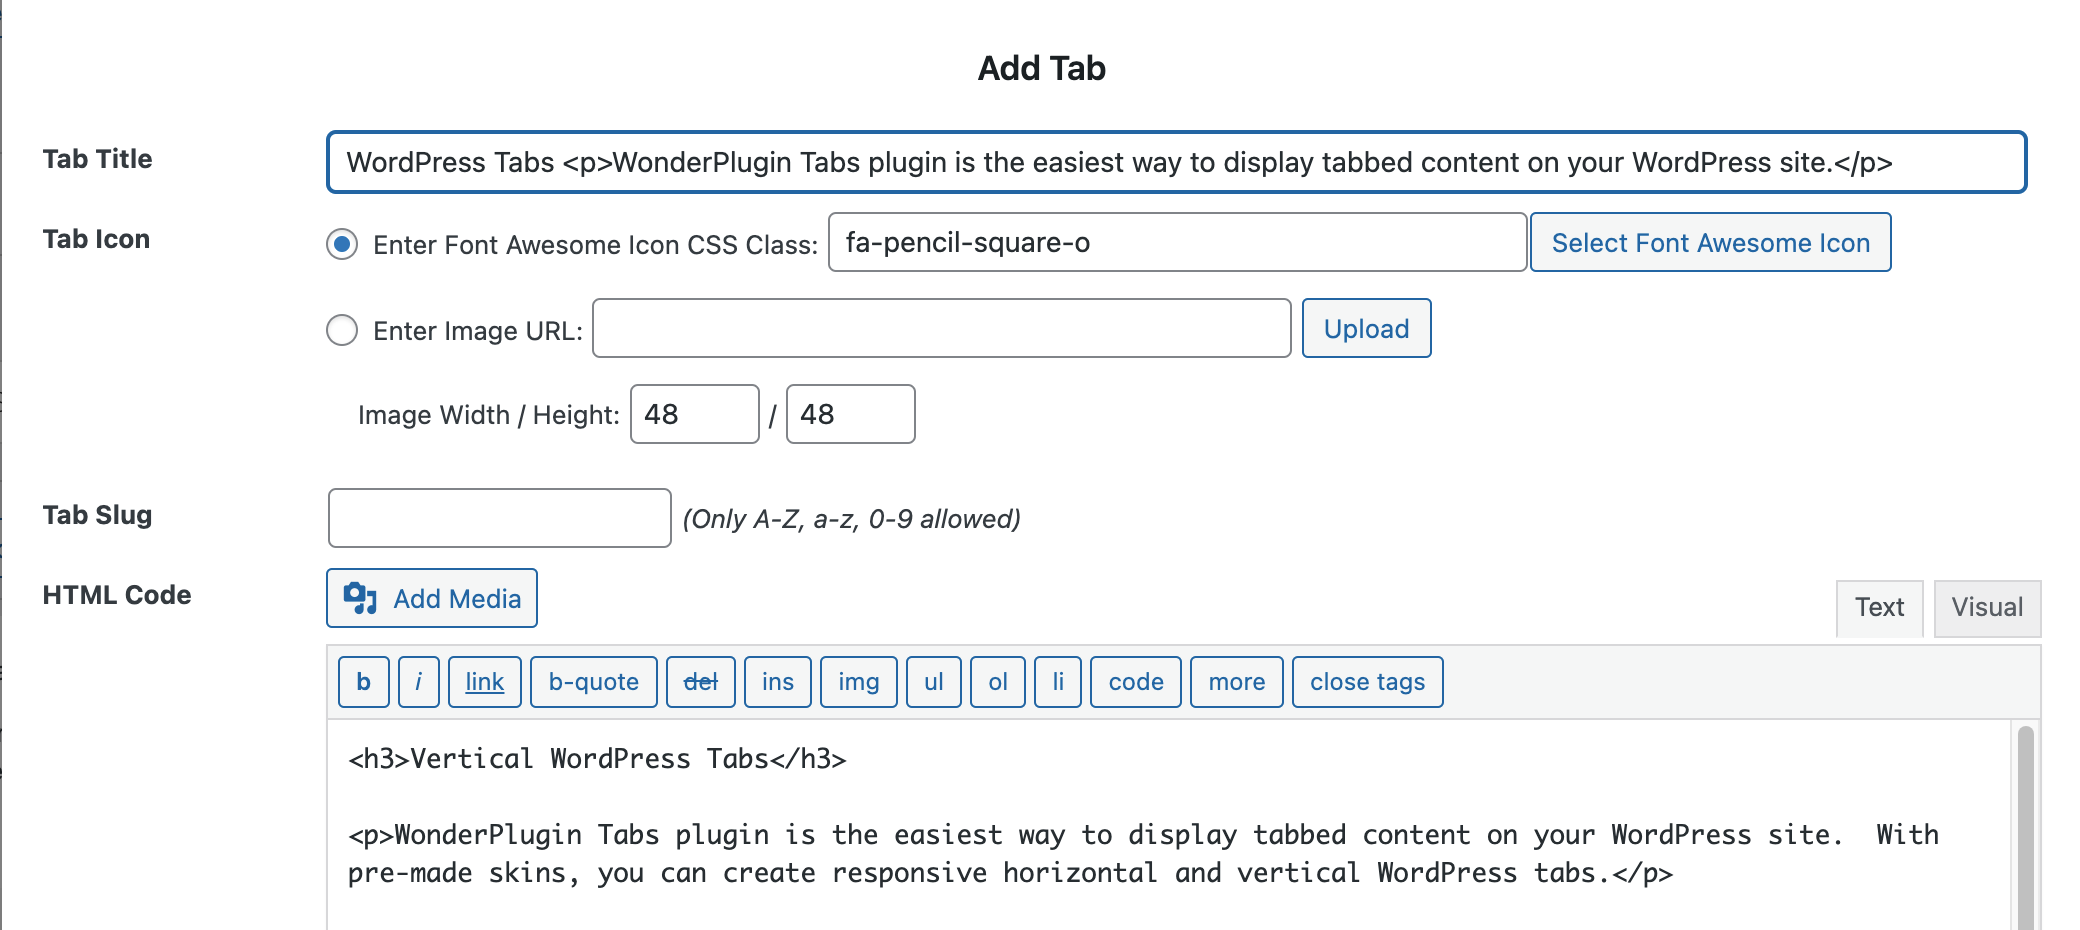
To add a subtitle to a tab header, in the Add Tab dialog, you can add HTML tags <p> and </p> to the Tab Title input box to create a paragraph. For example:
WordPress Tabs <p>WonderPlugin Tabs plugin is the easiest way to display tabbed content on your WordPress site.</p>
Step 2 - Add custom CSS code to style the tab headers
In the plugin, step 3 Options tab, Advanced Options, add the following code to the Custom CSS input box:
#wonderplugintabs-TABSID .wonderplugintabs-header-caption {
display: flex !important;
}

#wonderplugintabs-TABSID .wonderplugintabs-header-title {
width: 180px !important;
white-space: normal !important;
}

#wonderplugintabs-TABSID .wonderplugintabs-header-title p {
font-size: 12px !important;
margin: 0 !important;
}

#wonderplugintabs-TABSID .wonderplugintabs-accordionmode .wonderplugintabs-header-title {
width: auto !important;
}
In the above code, the line width: 180px !important; defines the width of the header title as 180px, you can change the number according to your own design.
The following CSS defines the font size and margin of the subtitles, you can change the CSS values or add extra CSS properties:
#wonderplugintabs-TABSID .wonderplugintabs-header-title p {
font-size: 12px !important;
margin: 0 !important;
}
The code adds !important to the end of all CSS values. This will prevent the CSS values from being overwritten by the default CSS or the WordPress theme CSS.
