Product:
Tutorial:
This tutorial will guide you how to add a different image to each audio in the WordPress audio player track list.
There are 4 steps in this tutorial:
- Step 1 - Add an image to each audio in the player
- Step 2 - Change the track list format and add the image
- Step 3 - Add CSS code to style the images
The created demo is as follows:
Step 1 - Add an image to each audio in the player
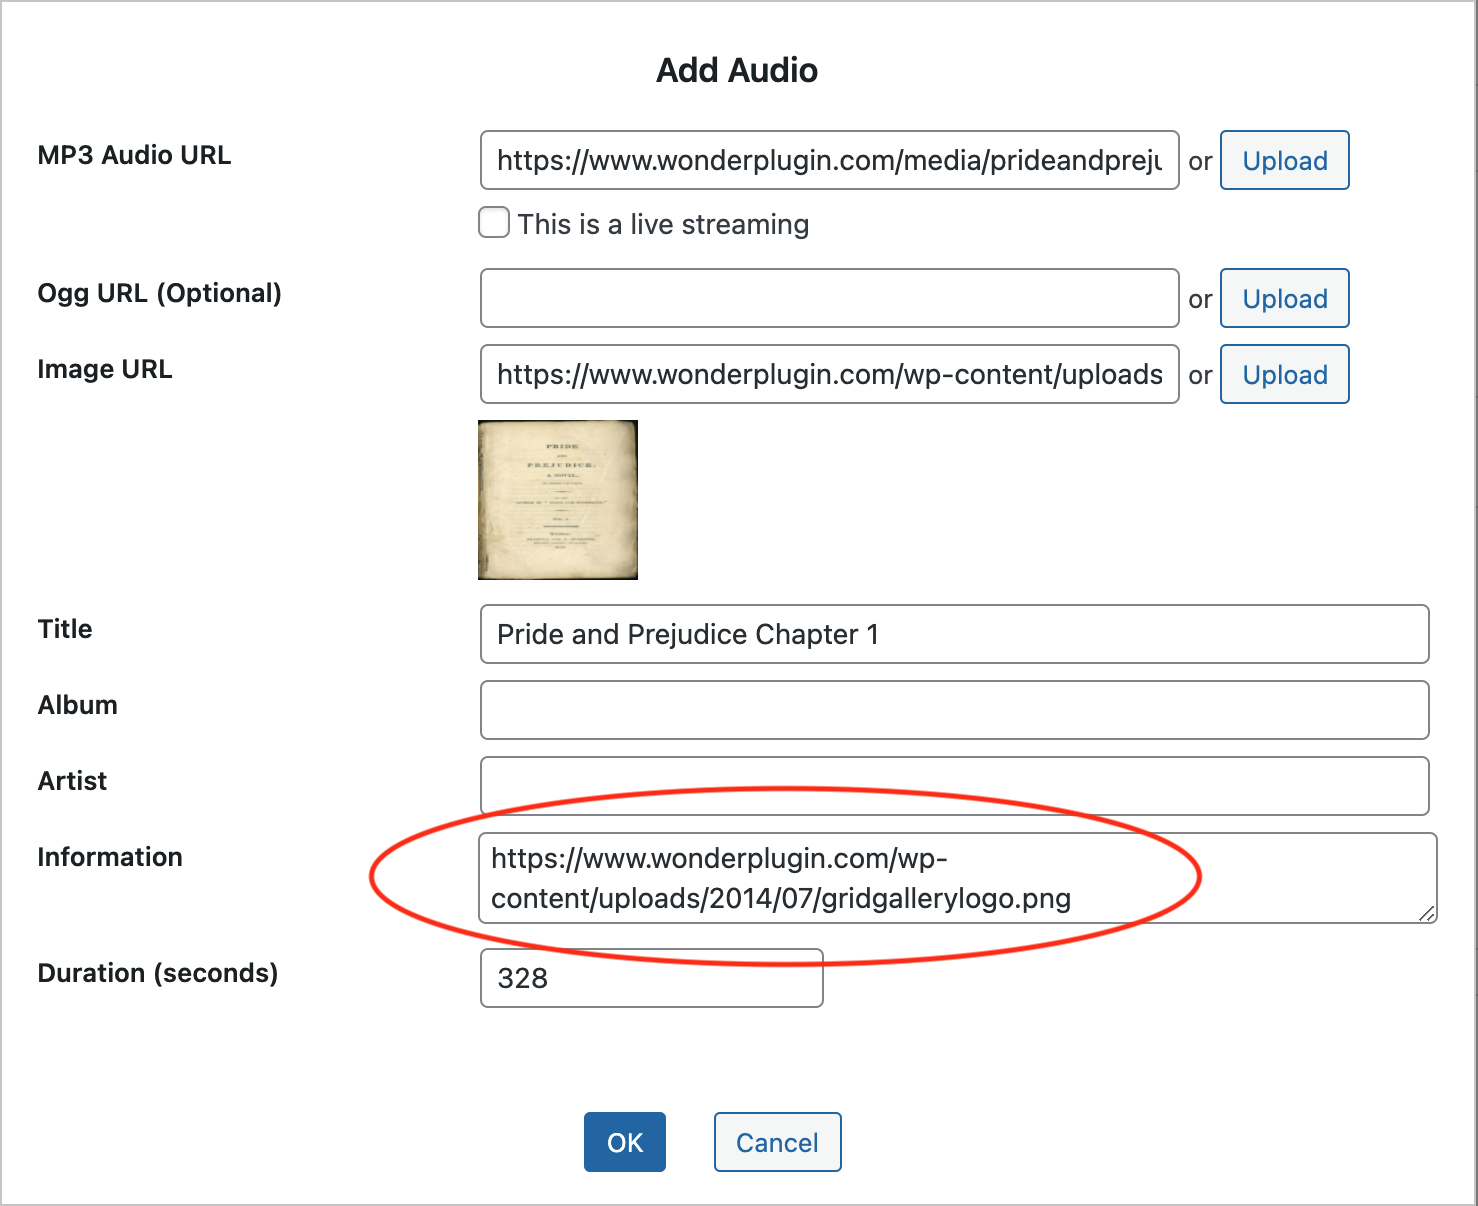
In Wonder Audio Player, create a new player, in step 1, click the Audio button to add an mp3.
In the Add Audio dialog, add the image URL that will be displayed in the track list to the Information input box.
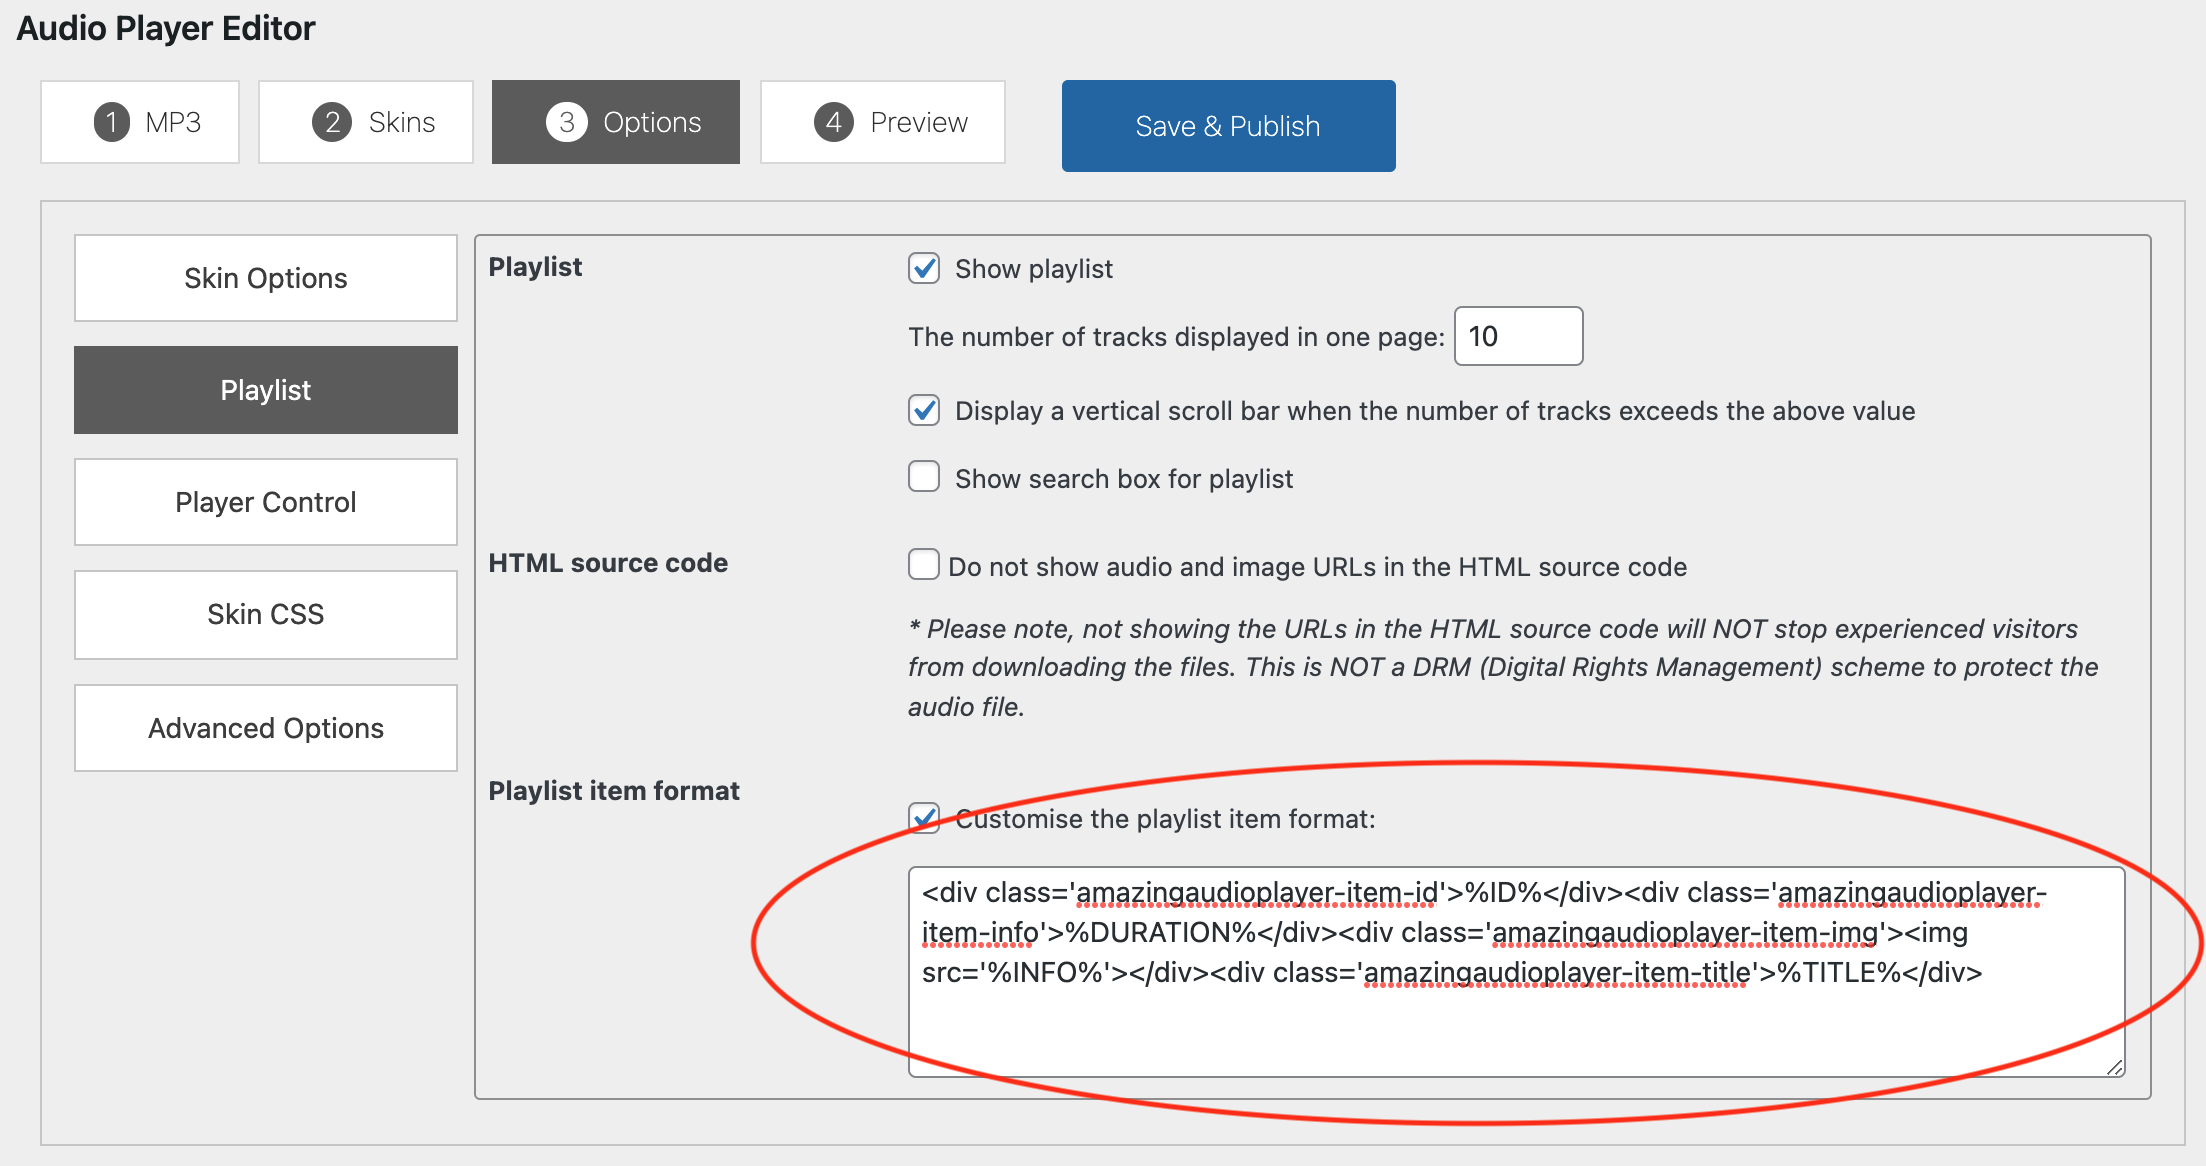
Step 2 - Change the track list format and add the image
In step 3 Options tab, go to the Playlist tab, check the option Customise the playlist item format, then add the following code to the input box:
<div class='amazingaudioplayer-item-id'>%ID%</div><div class='amazingaudioplayer-item-info'>%DURATION%</div><div class='amazingaudioplayer-item-img'><img src='%INFO%'></div><div class='amazingaudioplayer-item-title'>%TITLE%</div>
Step 3 - Add CSS code to style the images
In step 3 Options tab, Advanced Options, add the following code to the Custom CSS input box:
#wonderpluginaudio-AUDIOPLAYERID .amazingaudioplayer-item-img {
  float: right;
  margin: 0 4px 4px 0;
  line-height: 0;
}

#wonderpluginaudio-AUDIOPLAYERID .amazingaudioplayer-item-img img{
  width: 24px;
}
You can change the CSS code to adjust the size of the images.
