Elementor is one of the most popular WordPress page builders. This tutorial will guide you how to add an audio player to Elementor page builder. You can create an audio player with playlist or a single mp3 file.
There are 3 steps in the tutorial:
- Step 1 - Install Wonder Audio Player
- Step 2 - Create a WordPress audio player
- Step 3 - Add the WordPress audio player to Elementor page builder
Step 1 - Install Wonder Audio Player
First please install the WordPress premium plugin Wonder Audio Player. You can download the free version from the plugin home page, test it, make sure it works for you before upgrading to the commercial version.
Step 2 - Create a WordPress audio player with playlist
After you have installed the plugin Wonder Audio Player, in your WordPress backend, left menu, goto Wonder Audio Player -> New Audio Player, create a new player.
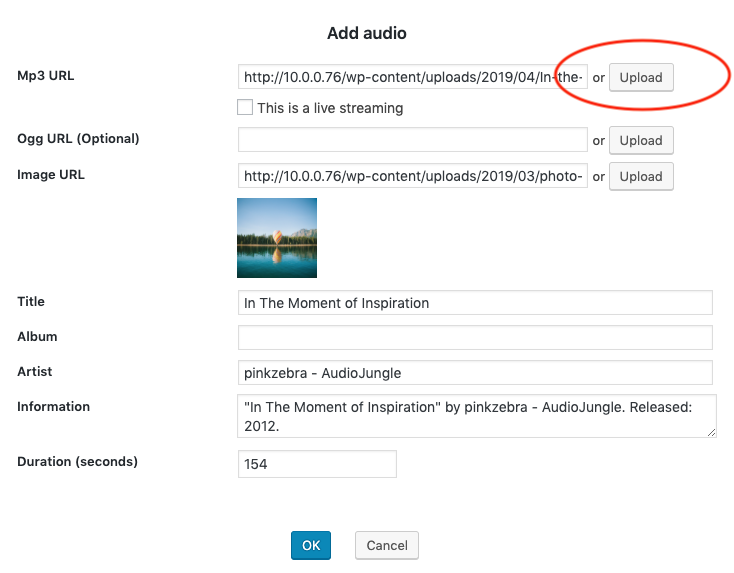
In the plugin, step 1, click the Add Audio button, in the Add Audio dialog, select or upload an mp3 file from Media Library. You can also select a cover image for the audio and enter title, album and artist information.
In the plugin, step 2, Skins tab, select a skin. If you want to create an audio player with playlist, make sure to select a skin with playlist.

Click the Save & Publish button, the plugin will create the player and display its shortcode.
Step 3 - Add the WordPress audio player to Elementor page builder
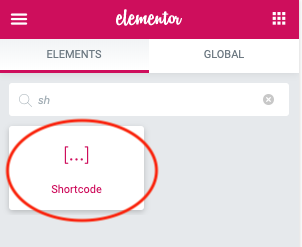
To add the created WordPress audio player to Elementor, in the page editor, add a Shortcode element.
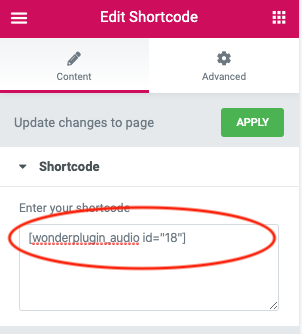
Copy the audio player shortcode and paste it to the Shortcode element.
The audio player may not display in the page builder itself. To view the player, Publish or Update the page then view the audio player in the published WordPress page or post.
