Product:
WonderPlugin Portfolio Grid Gallery
Tutorial:
In a gallery created with WonderPlugin Portfolio Grid Gallery, when you click an image in the gallery, by default, it will open a lightbox gallery that contains all images/videos in this gallery.
In this tutorial, we will create a grid gallery, when clicking on an image in the gallery, it will open a different lightbox gallery for each image. That's, for each image in the grid gallery, you can create its own lightbox gallery and open it on click the image.
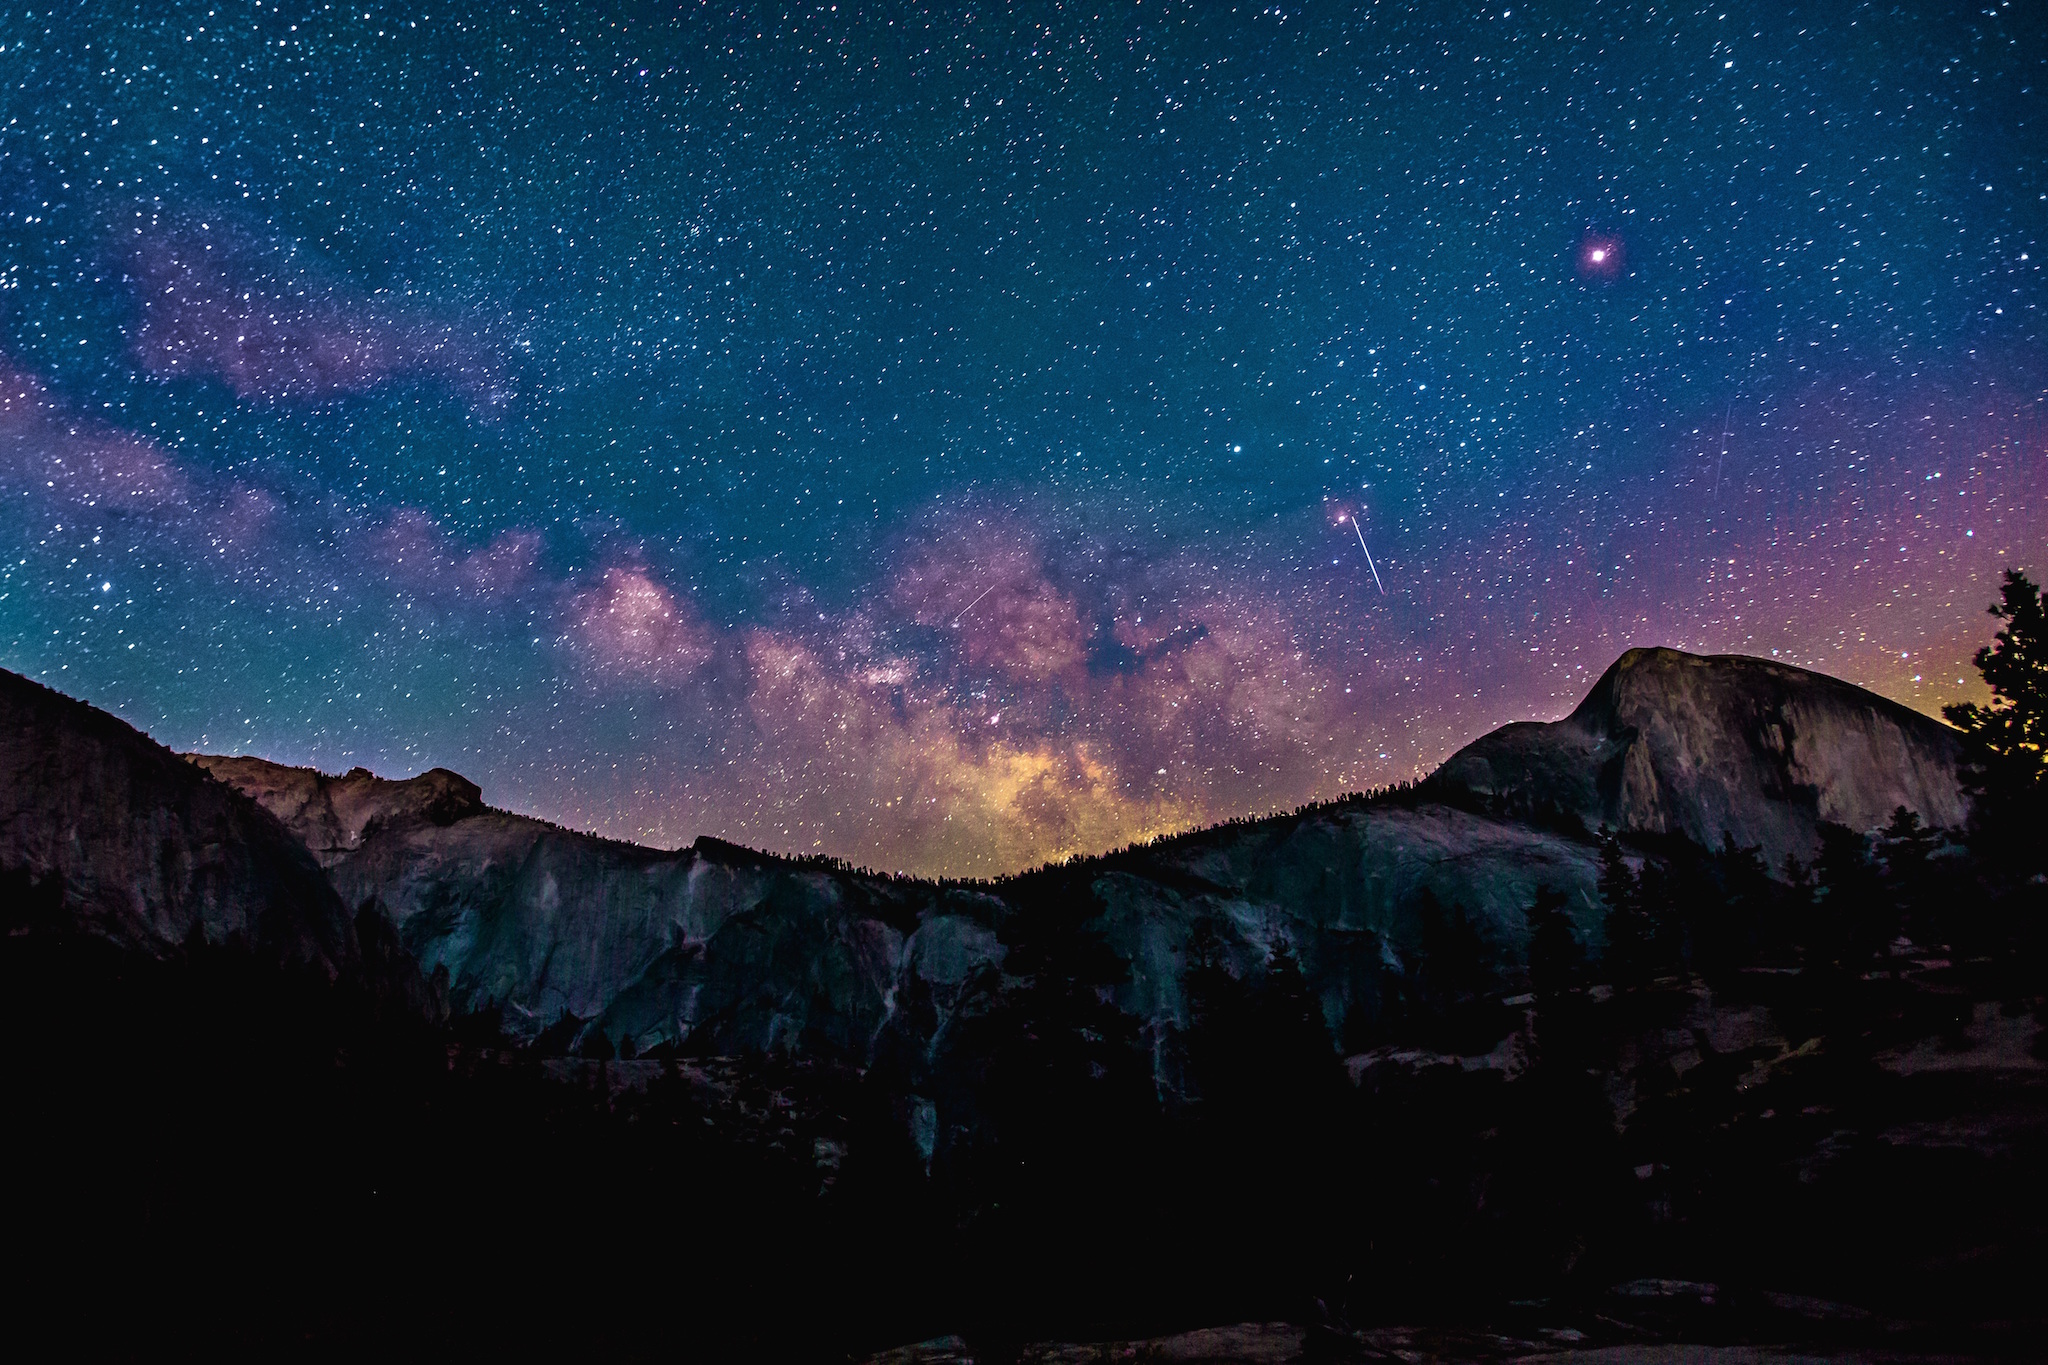
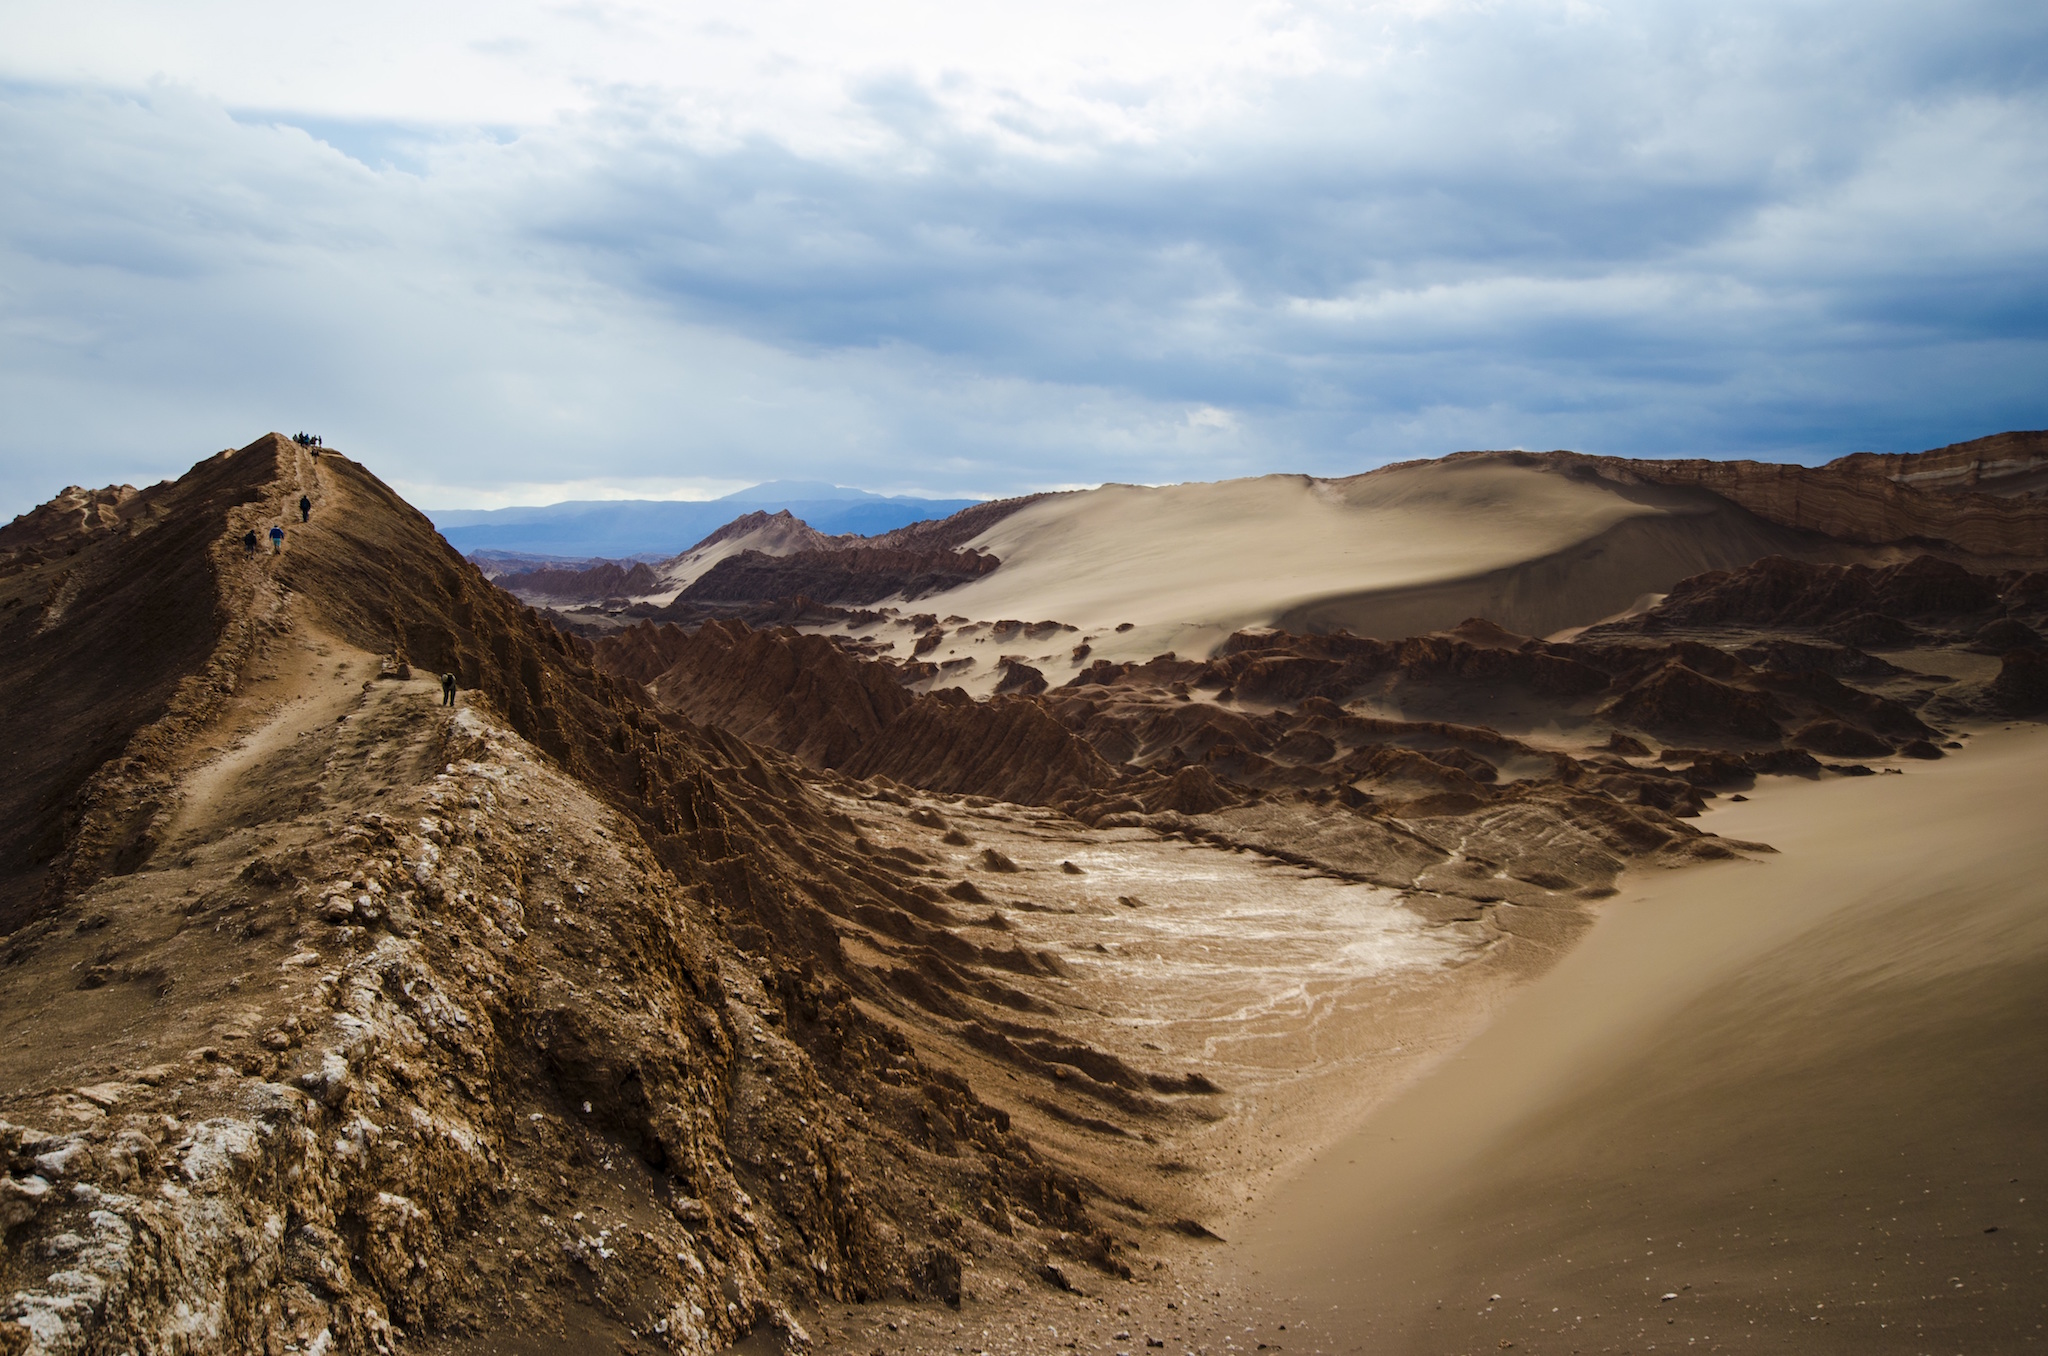
The created demo is as follows:


To create the above demo, we need to create three galleries: one grid gallery (the gallery displayed on the page) and two lightbox galleries.
The grid gallery has two images, each image has its own lightbox gallery, so we need to create two lightbox galleries, one for each image.
Step 1 - Create two lightbox galleries
When creating the lightbox gallery, in the plugin, step 1 Images & Video tab, Add Image dialog, "Lightbox and Weblink" tab, make sure you check the option "Click to open Lightbox popup" -> "Open current image in Lightbox". This option is checked by default.
In step 4 Options tab, select the option "Lightbox gallery" -> "Only display first image in grid gallery and create a Lightbox gallery".
In this step, I created two lightbox galleries: ID 23 and ID 24.
Step 2 - Create the grid gallery and link each image to its own lightbox gallery
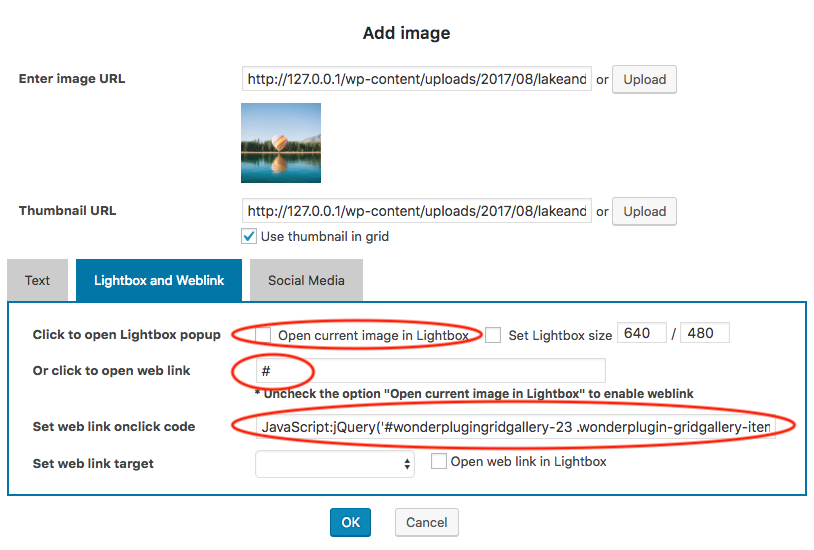
In WonderPlugin Portfolio Grid Gallery, step 1, add an image, in the Add Image dialog, "Lightbox and Weblink" tab, uncheck the option "Open current image in Lightbox", enter # to the input box "click to open web link", enter the following code to the input box "Set web link onclick code":
jQuery('#wonderplugingridgallery-23 .wonderplugin-gridgallery-item-img').eq(0).click();return false;
In the above code, 23 is the ID of the lightbox gallery we have created for this image.
Be sure to change the number to the ID of your own lightbox gallery of this image.
Please note, currently the following gallery skins do not work with this tutorial: "Hover", "3D Flip", "3D Flip with Title" and "Circular 3D Flip". Please do not select these skins when you create the final gallery.
In this step, I created the grid gallery: ID 35.
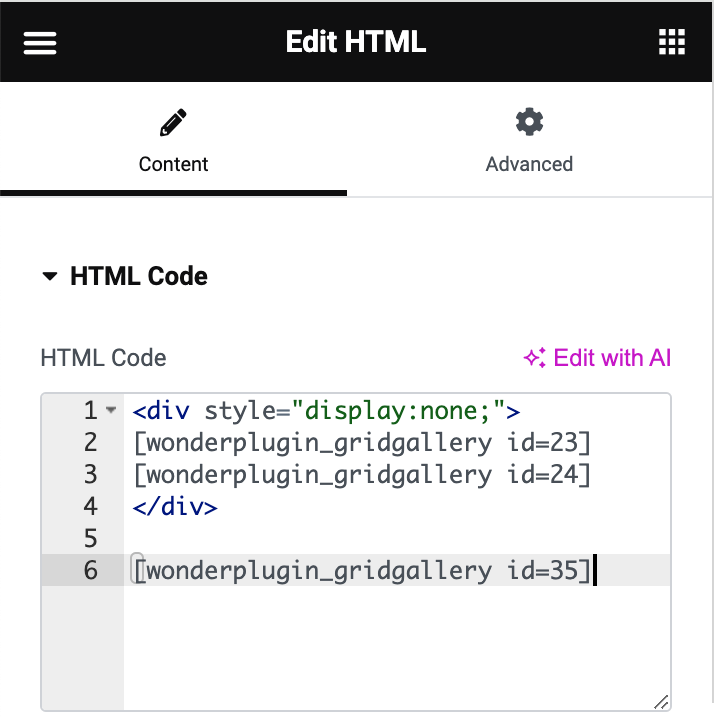
Step 3 - Add shortcodes of the lightbox galleries and the grid gallery to the post or page
In your WordPress post or page editor, switch to Text mode, then add the following code:
<div style="display:none;">
[wonderplugin_gridgallery id=23]
[wonderplugin_gridgallery id=24]
</div>

[wonderplugin_gridgallery id=35]
ID 23 and ID 24 are lightbox galleries created in step 1. ID 35 is the grid gallery created in step 2.
To hide the lightbox galleries by default so they can only be opened by the grid gallery, the shortcodes are wrapped inside a div that has the CSS style display:none.
The grid gallery contains two images. The first image will open the lightbox gallery ID 23, the second image will open the lightbox gallery ID 24.
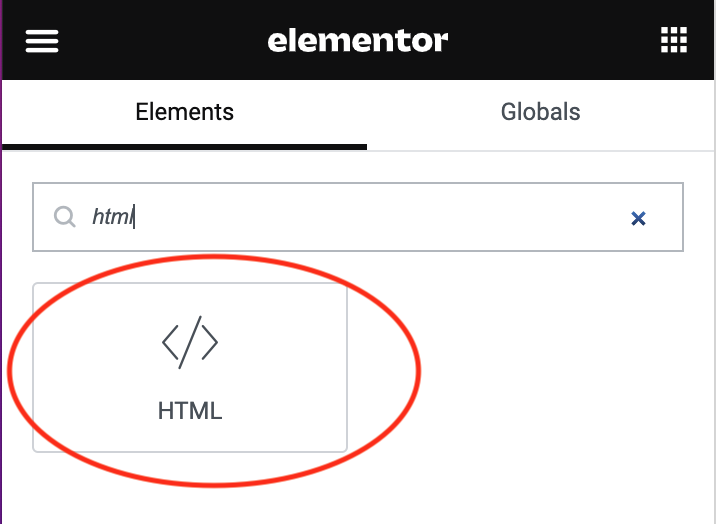
If you are using a page editor like Elementor, you can add an HTML widget and then insert the code.